Building an Offroad Camper
Installing Cabin Heating from the Cylinder Head
Early Land Rovers had a heating system as an optional extra and these were a simple device that had a tap on the thermostat housing, which diverted heating water to a 'heater matrix' in the cabin. There was then a small fan on these devices that pulled air over the heater and blew it back into the cabin. The efficiency of these heaters was debatable, but I guess that is better than nothing!
Our Landy is an early(ish) Series 2 Land Rover, so heating was an option and due to it being an Army vehicle, it didn't have any form of heating (or doors, or roof and quite often the windscreen would have been folded down too).
The heating heater pipes coming off of the engine head have quite a bit of discussion forums and depending on the 'part number' on the head, you may have metric threaded (M16x1mm) bolts or 3/8BSP and there doesn't seem to be very much clear logic to which cylinder had which thread type. To the right is an excellent document (sadly I cannot reference the author due to the document being on multiple websites, so let me know if you know who created it) and that lists some of the versions of tap and thread. In theory only the very later models had the fine metric thread.
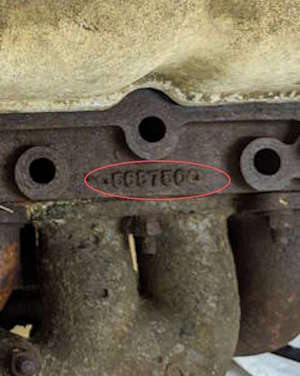
Our cylinder head has a number that is 568750, which according to the document on the right, "... was introduced in the late 1960s and used until late 1970s. These were installed on Series IIa and Series III. 7:1 or 8:1 CR and with or without Otter switch for choke warning lamp control."These consistently had a BSP thread and not metric.
All our engine had was two blanking bolts and one is at the back of the cylinder head on the right hand side as you stand at the front of the car and is between the two head bolts. The other is to the left of the thermostat housing and both are easily accessible.
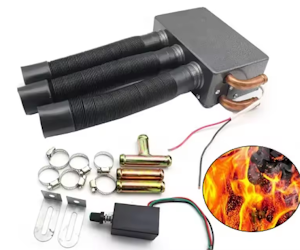
To find an original Smith's heater in some form of working condition is very difficult and a very expensive process, therefore I did the next best thing and embraced globalisation and found a heating device that works on exactly the same concept as the original Smith's heater and it was on AliExpress and AU$70! To be honest, the metal housing looks great, the two fans do push a small amount of air around and it connects to the heating pipes that attach to the two bolt holes in the Cylinder head. For AU$70 (and free shipping), it was worth a go, and when it arrived I was very impressed by the steel casing and the heating fins inside, so decided to install it.
The heater came with 5/8in hose connectors, a few connectors, mounting brackets and a variable switch to turn it on and off. Â The three flexible hoses are not wonderful and very cheap plastic, however they will do for a start and they are very easy to replace later on if needed.
The AliExpress Heater!
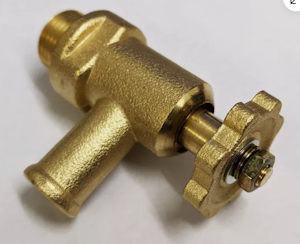
The first challenge was to find the tap/valve that is installed to the left of the thermostat housing, which is the return side (hot) of the cooling system. On a Series 2 Land Rover, this was simple brass tap that was manually opened and closed to enable the flow of hot water to the heater unit. Â I can see a slight downside to this, where if you are driving along and it starts to get cool, you have to stop the car, open the bonnet, burn your hand on a metal tap and then close the bonnet again. Â I guess it is a seasonal thing, where you open it when things start cooling down and leave it open.
The tap and return coupling that fitted to our Cylinder Head are a 3/8in BSP (19TPI), which is pretty standard and is the same tap and thread used on a of several classic cars, including the Austin Healey. Therefore this makes it a lot cheaper and relatively easy to source. I purchased a tap off of eBay from the UK, for AU$60 and the return coupling off of AliExpress (3/8in BSP) for $3, including shipping!
The Hand Burning Tap
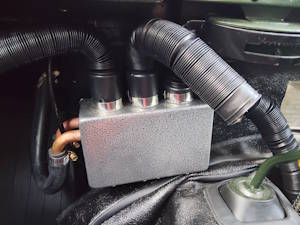
The final heater install is complete, and the 1/2 inch heater hoses are routed through the firewall, with 1/2in to 5/8in adapters to allow them to connect to the 5/8in copper pipe on the heater.  (The tap and the return flow coupling on the cylinder head are 1/2in hose). The electrics are wired, and turning it on creates a small, but noticeable breeze. Now I just need some cooler weather and a decent test drive to try it out and make sure it doesn't leak.
The AliExpress Heater!
Share this page with fellow Landy fans: